
How to Automate Elastic Cloud with Terraform (Beta)
While it’s nice to click around a UI for exploring, Infrastructure as Code is what you want for production; both for documentation and to (re-) create resources whenever needed because nobody can remember what they configured a couple of months ago.
Also, to minimize drift between environments, you want to have automation in place. Otherwise, production might have some additional surprises for you.
Elastic Cloud hasn’t had a stable public API until May. Since then, you can automate your clusters:
- Elastic Cloud Control (ecctl) is the official command-line interface. It covers both the public Elastic Cloud service as well as Elastic Cloud Enterprise, though this post only focuses on the public service.
- ecctl, in turn, depends heavily on Elastic’s cloud-sdk-go library, which provides a common ground for all of Elastic Cloud’s programmatic code in Go.
However, for managing infrastructure, Terraform providers are pretty much the standard by now. While ecctl and the SDK have a stable release (1.1.0 at the moment), the Terraform provider for Elastic Cloud has just been released as beta and is now also available on the Terraform Registry. Since it’s also building on top of cloud-sdk-go, it is coming along quite nicely. Though use it at your own risk.
Automate with Terraform #
Before you start, you need to have Terraform 0.13+ installed. On macOS, run brew install terraform if you don’t have it already and check your setup with:
$ terraform version
Terraform v0.14.2
And that’s all the preparation that is needed.
Create a file terraform.tf with the content:
terraform {
  required_providers {
    ec = {
      source  = "elastic/ec"
      version = "0.1.0-beta"
    }
  }
}

resource "ec_deployment" "terraform-demo" {
  name                   = "terraform-demo"
  region                 = "eu-west-1"
  version                = "7.9.0"
  deployment_template_id = "aws-io-optimized-v2"

  elasticsearch {
    topology {
      size       = "2g"
      zone_count = "1"
    }
  }

  kibana {
    topology {
      size       = "1g"
      zone_count = "1"
    }
  }
}
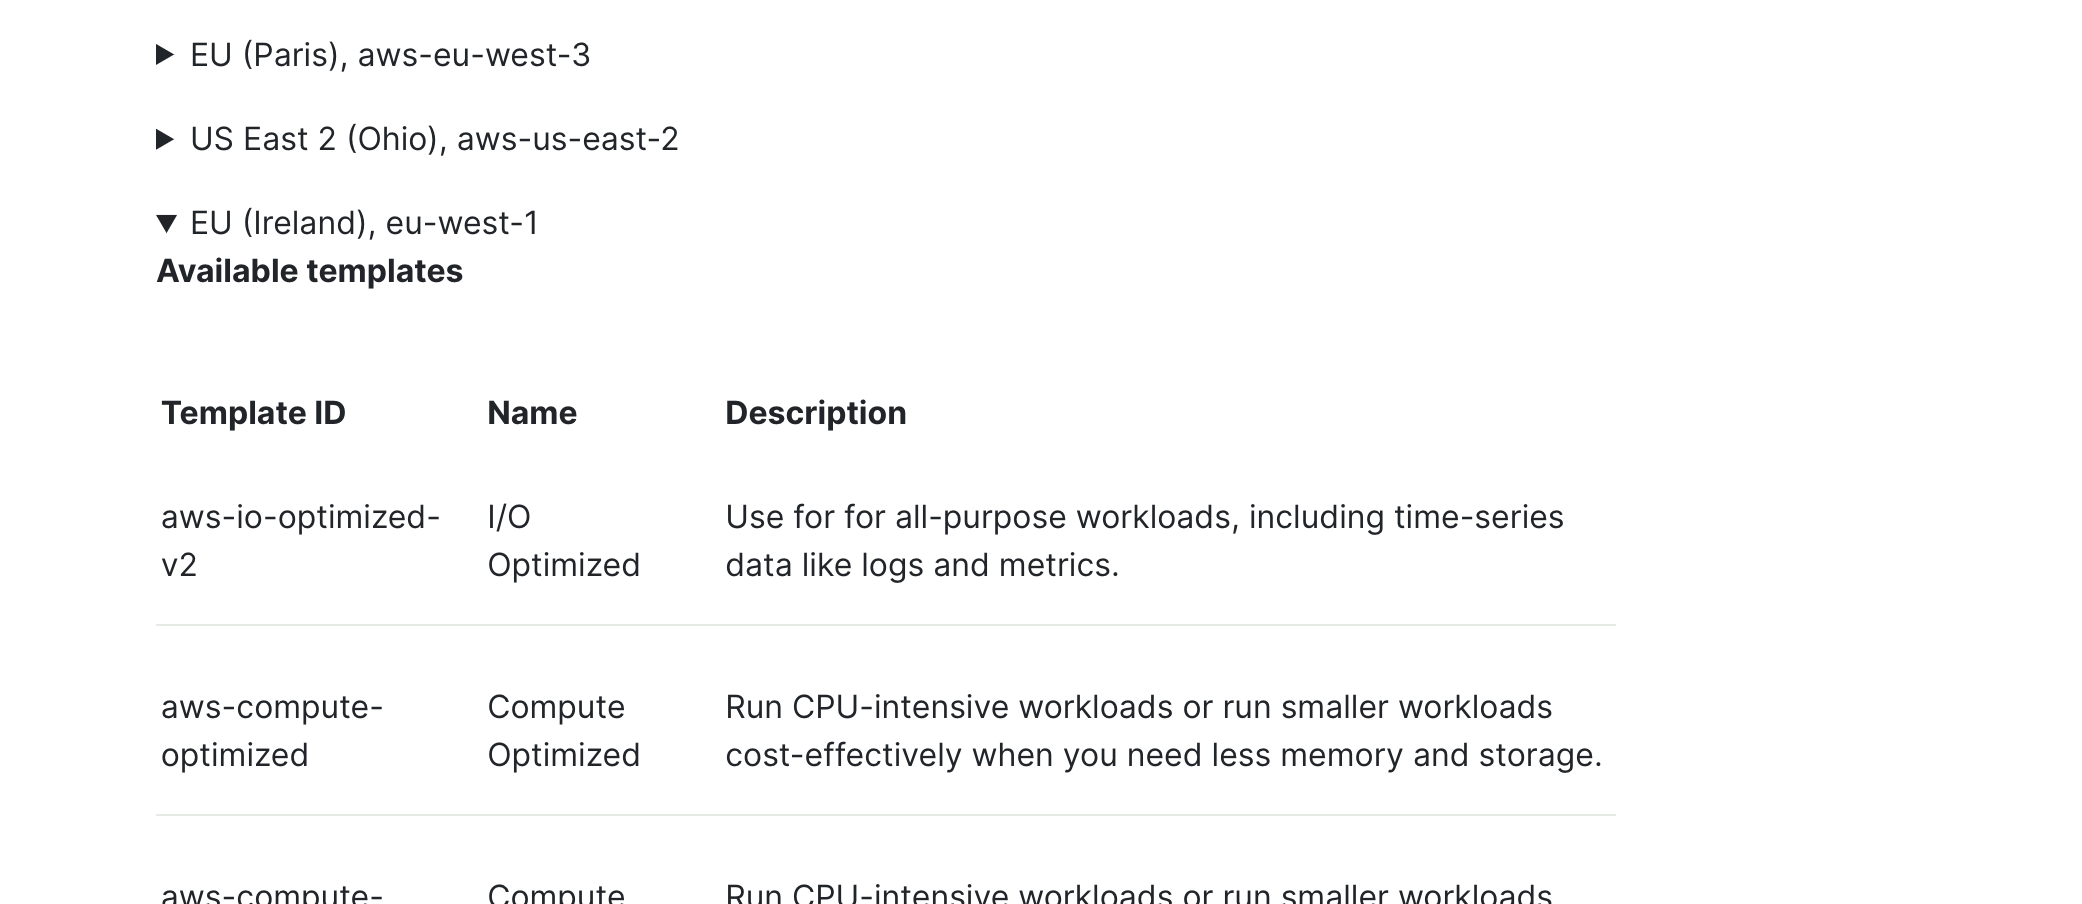
Most of this should be self-explaining, like the memory size per instance or zone_count for availability zones. But region and deployment_template_id require more detail: In the documentation for “Available regions, deployment templates and instance configurations”, you get a list of the available regions on AWS, Azure, and GCP. Each of these regions contains the complete set of available templates and instances. The example above is a good starting point. Still, for more advanced setups in resource usage (compute- or memory-optimized, hot-warm architecture) or use-case (Enterprise Search, Observability, Security), you should use a more specialized setup.
Next up, initialize Terraform — only showing the relevant output:
$ terraform init
…
Initializing the backend...
Initializing provider plugins...
- Finding elastic/ec versions matching "0.1.0-beta"...
- Installing elastic/ec v0.1.0-beta...
- Installed elastic/ec v0.1.0-beta (unauthenticated)
Terraform has been successfully initialized!
Then try to plan your configuration, which will fail:
$ terraform plan
…
Error: authwriter: 1 error occurred:
  * one of apikey or username and password must be specified
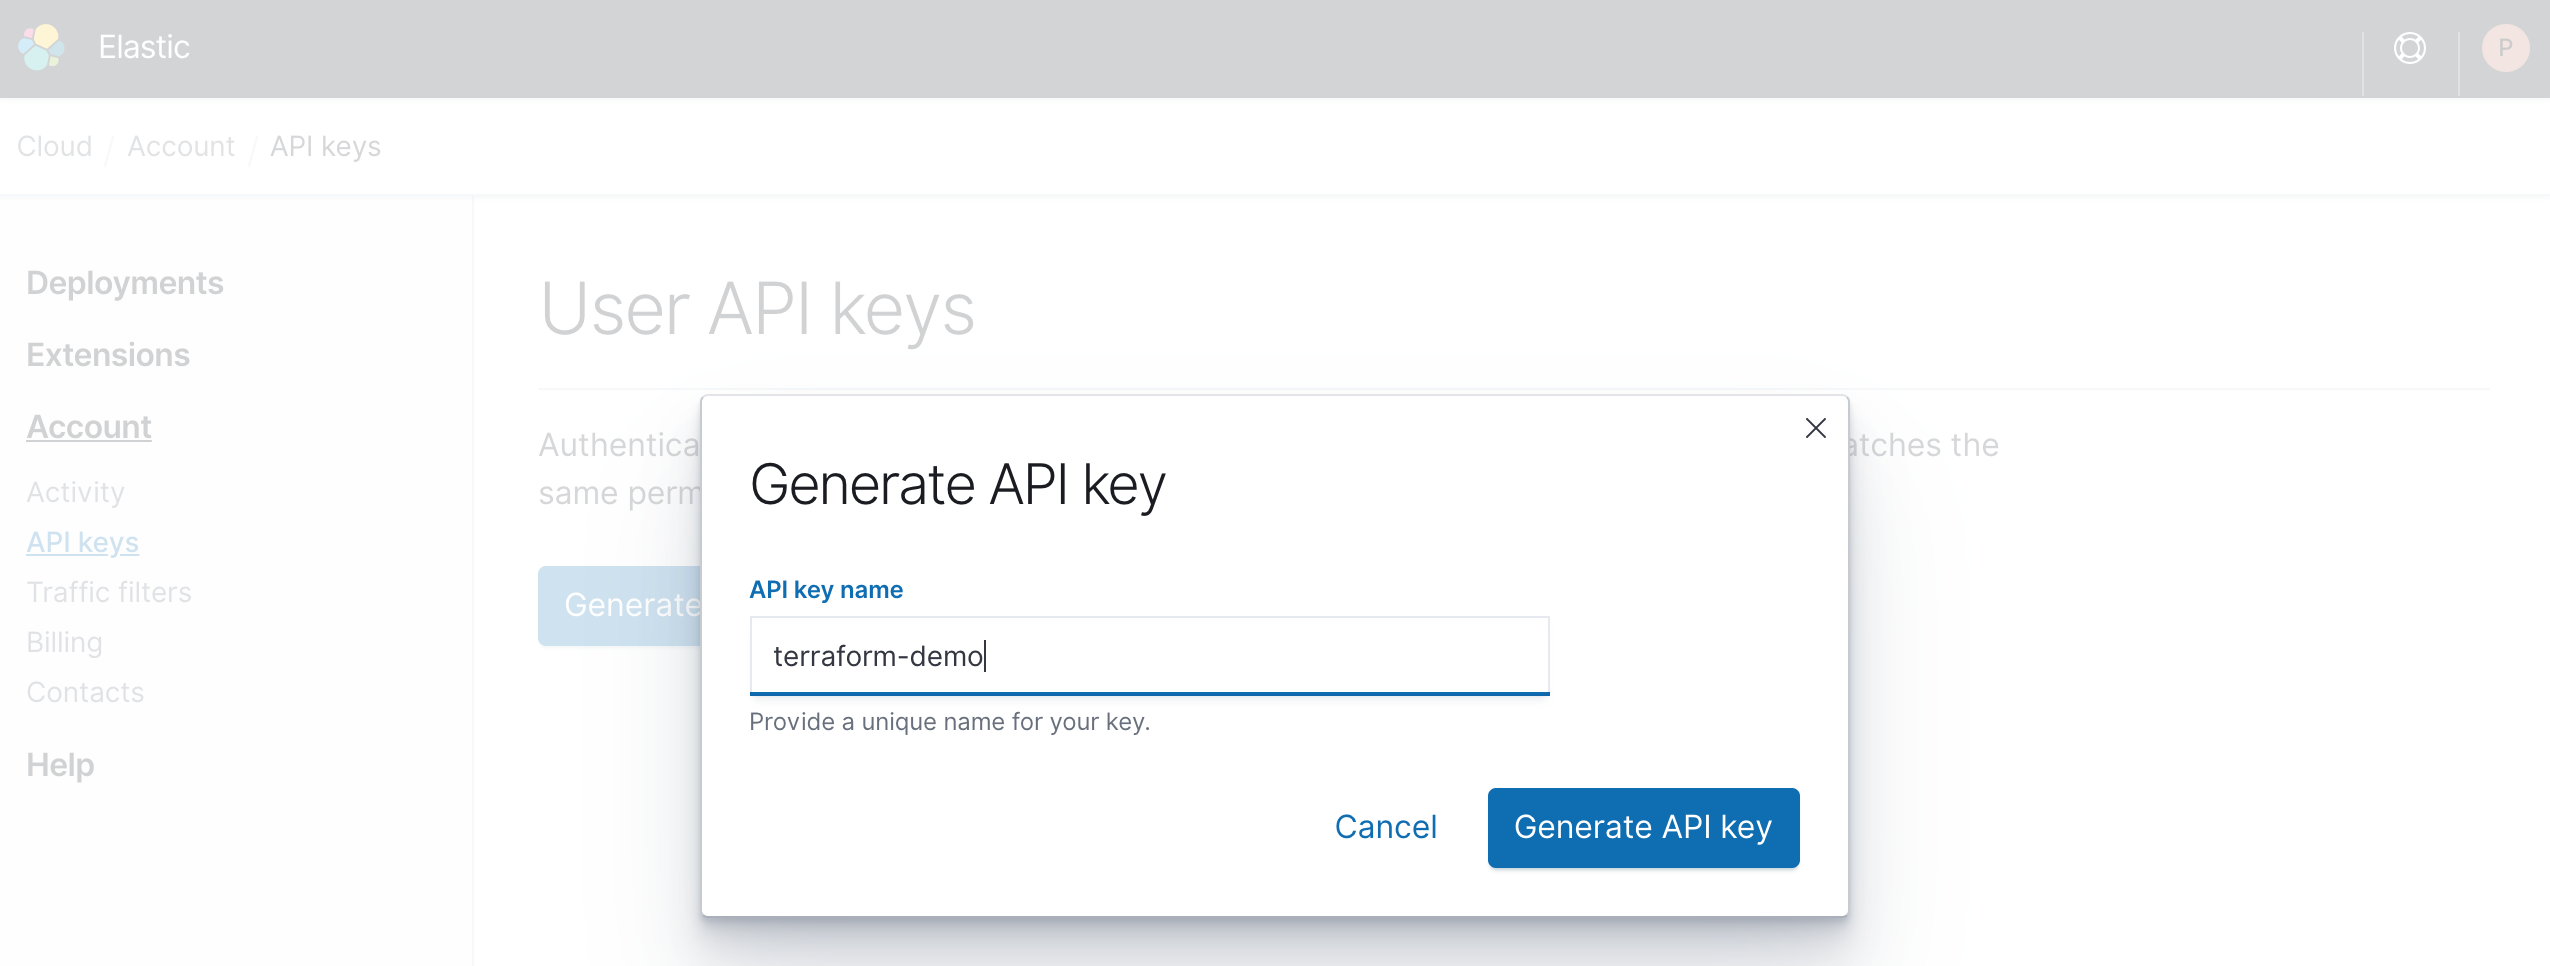
Time to get your API key. Log into Elastic Cloud and head to the API keys page under Elasticsearch Service → Account → API keys to generate a key.
Now you could store the API key in the Terraform file, but this is a bad idea. Don’t share your secrets and don’t check them into source control — this is one of the most common reasons for hijacked accounts or ransomed data.
While you can set the environment variable EC_API_KEY directly, I’m a big fan of envchain. It allows you only to expose the environment variables needed for the current command and also makes working with different environments, accounts, or clients much saner. The following command creates an ec namespace and will ask you for the key:
$ envchain --set ec EC_API_KEY
Now back to the Terraform plan. If you have set EC_API_KEY without using envchain, remove envchain ec from this and all upcoming commands. There will be a fair bit of output, but only the last line with Plan: is really relevant:
$ envchain ec terraform plan
…
Plan: 1 to add, 0 to change, 0 to destroy
This is what it should look like. Next, apply the template and confirm with yes when asked:
$ envchain ec terraform apply
After a little while, your brand new cluster is up and running. You can log into Kibana with the “Open Kibana” button without needing a password thanks to Single Sign-On (since Elastic Stack 7.7).
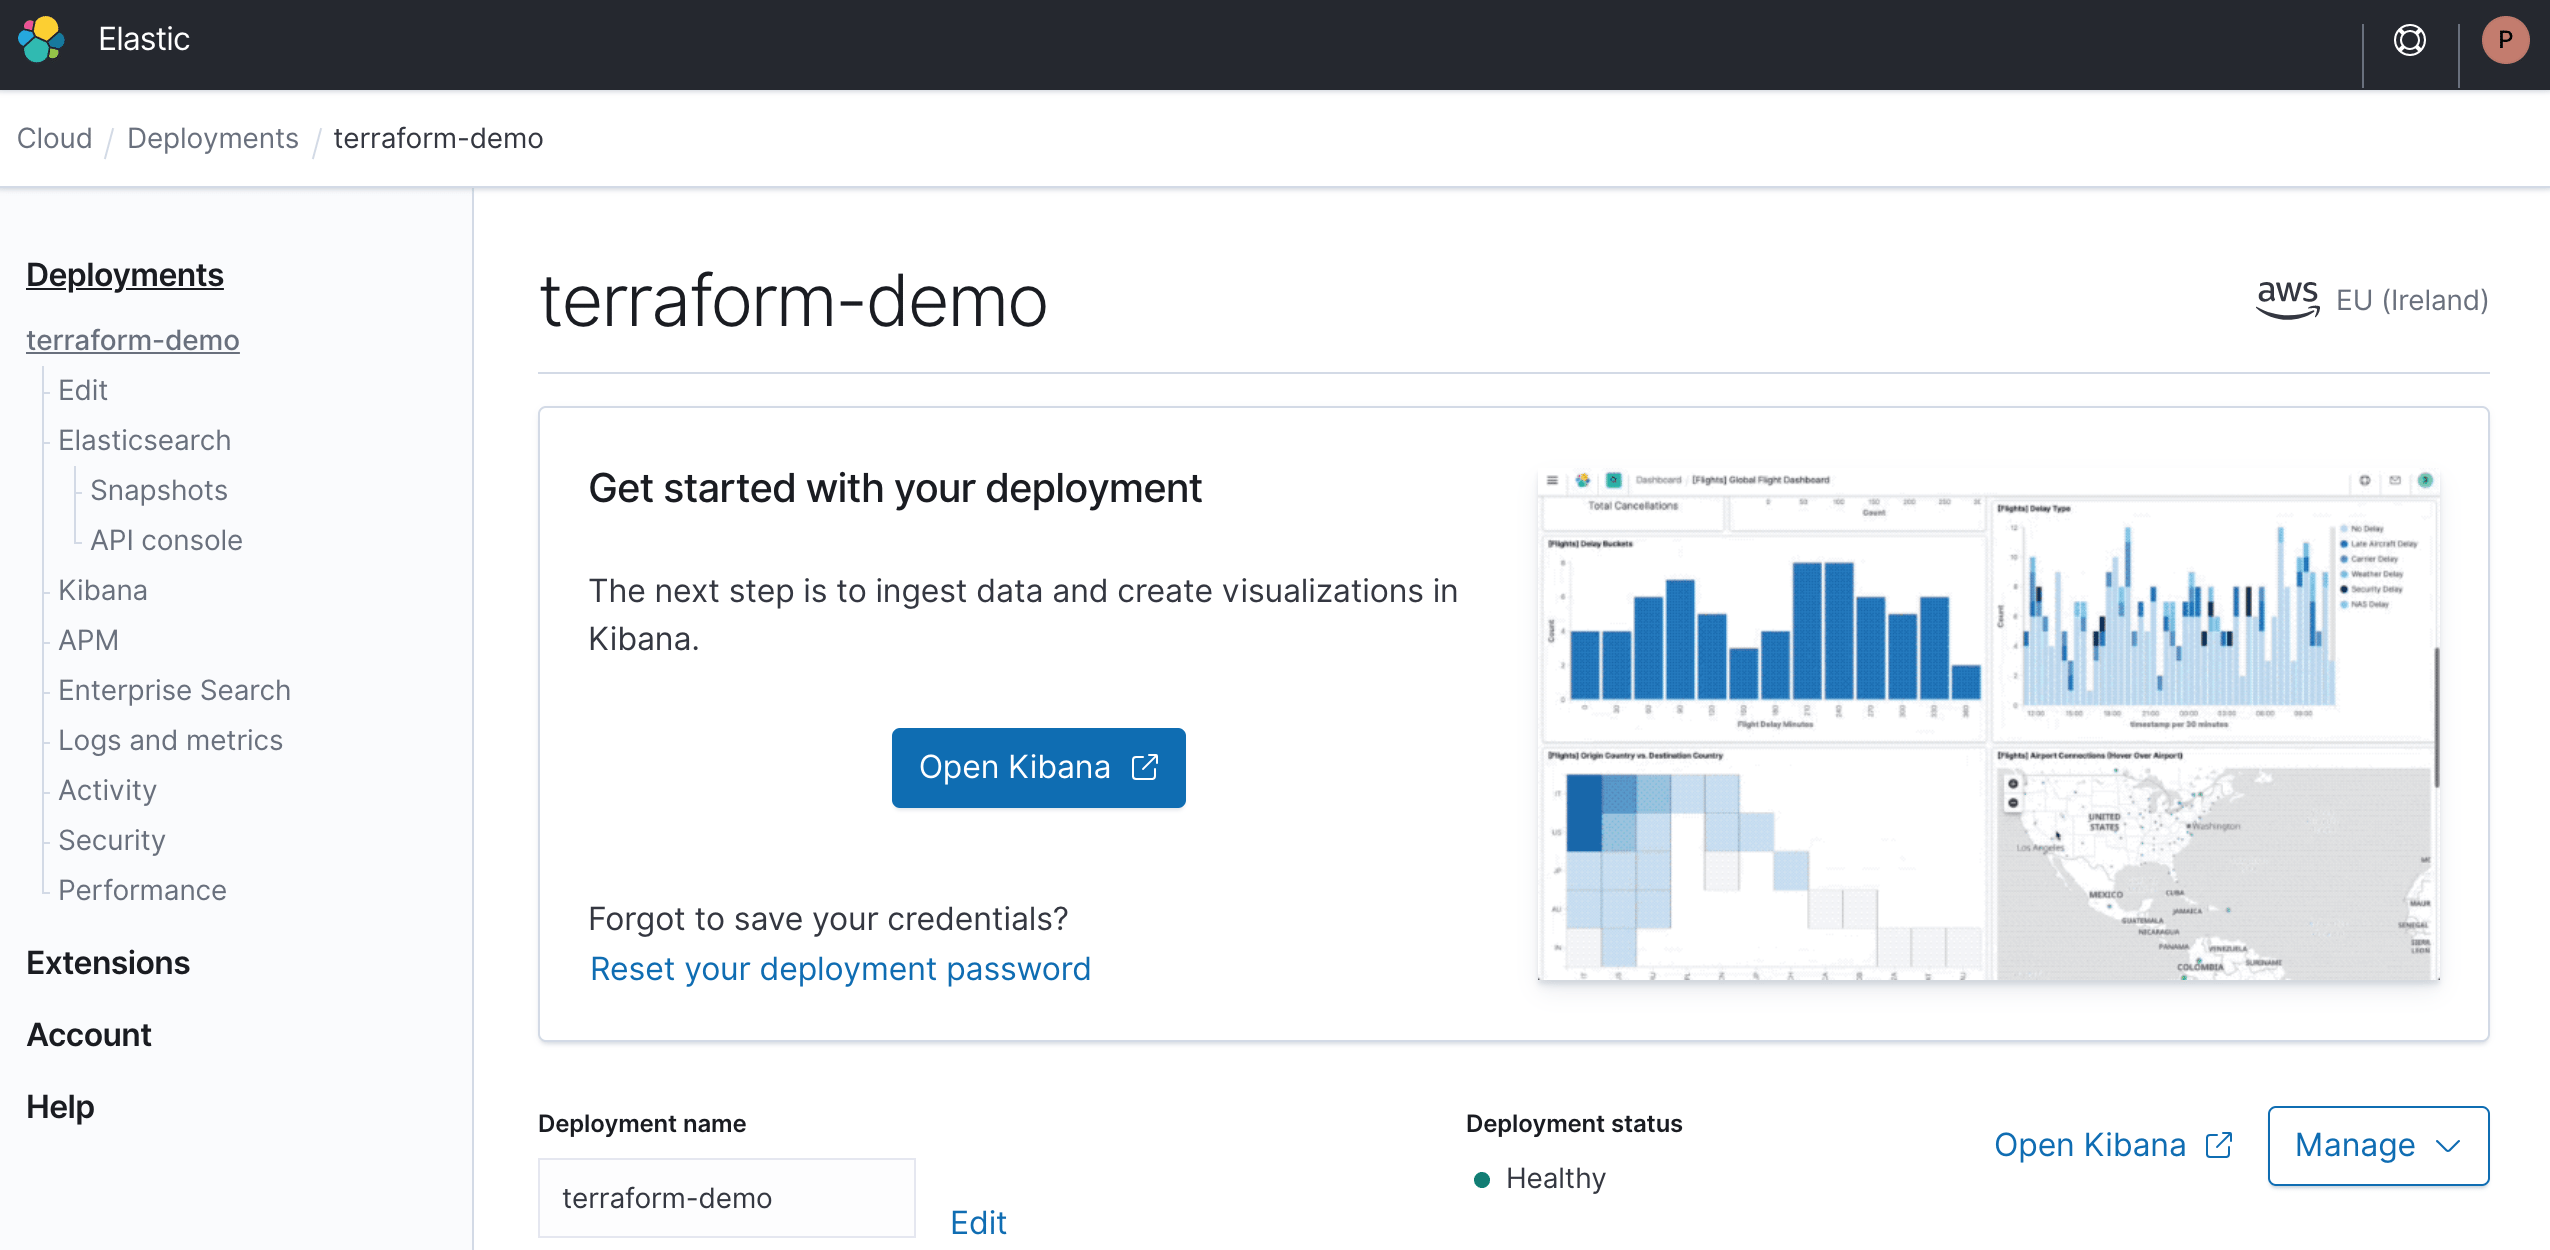
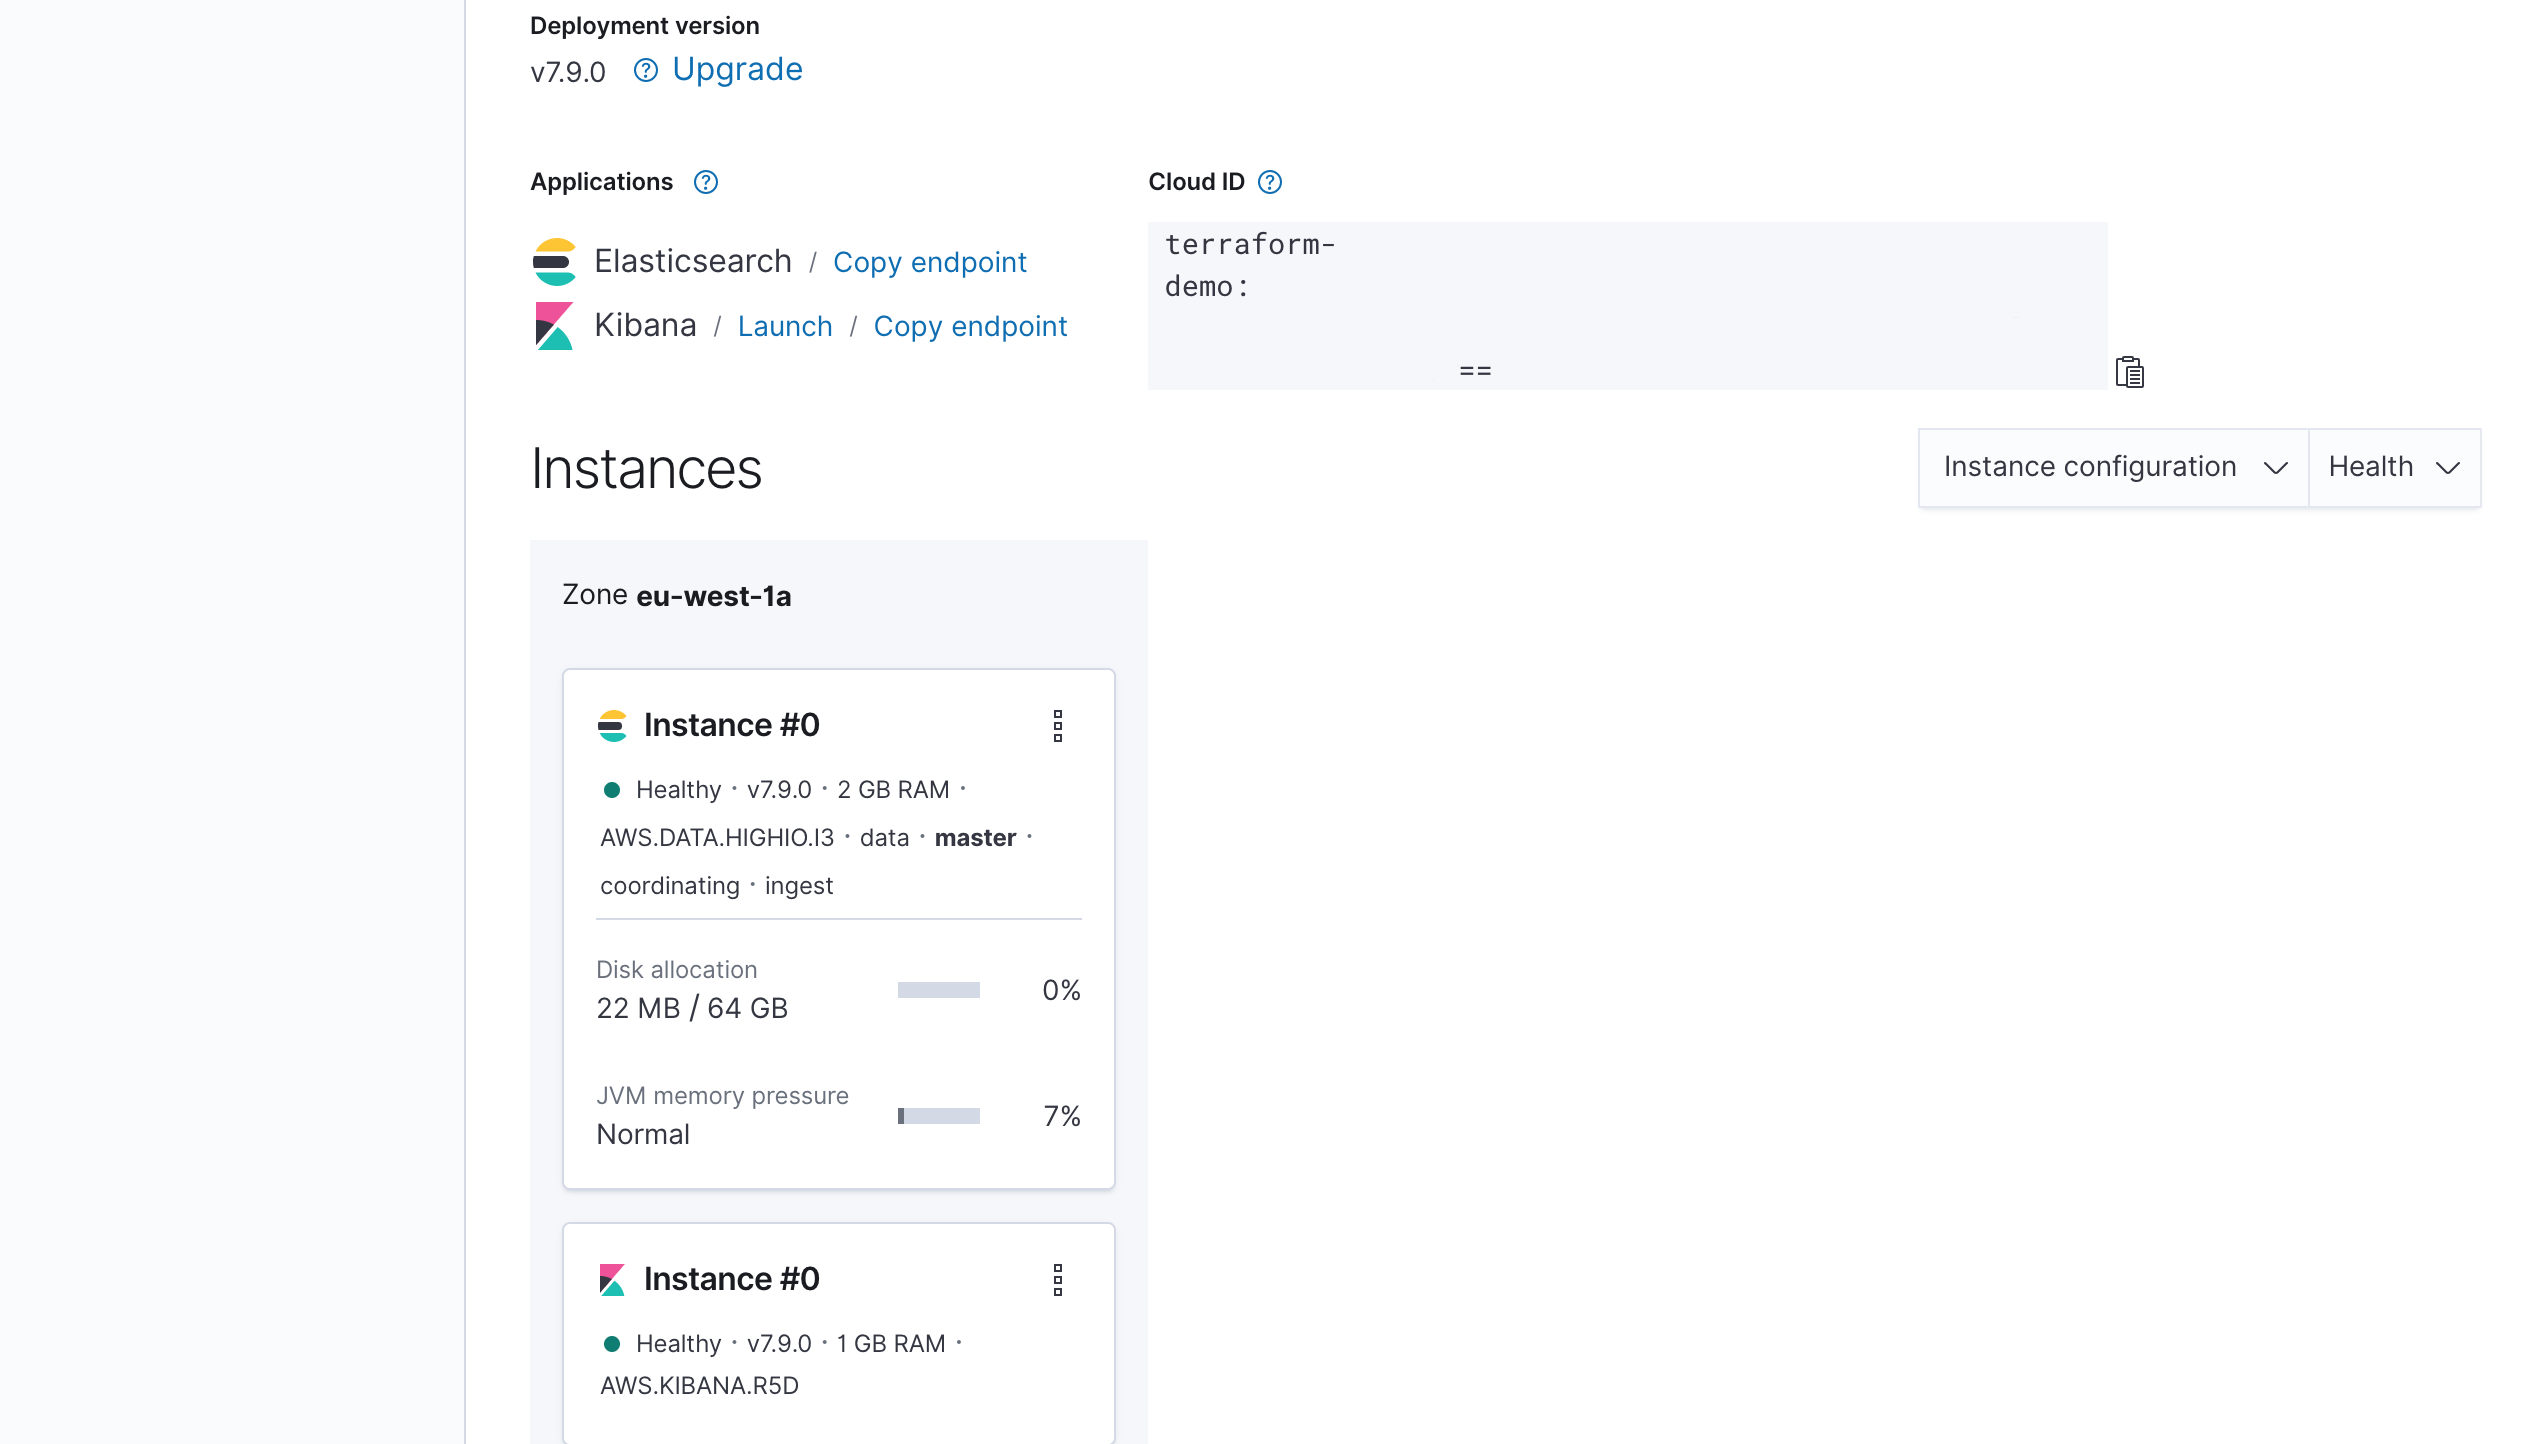
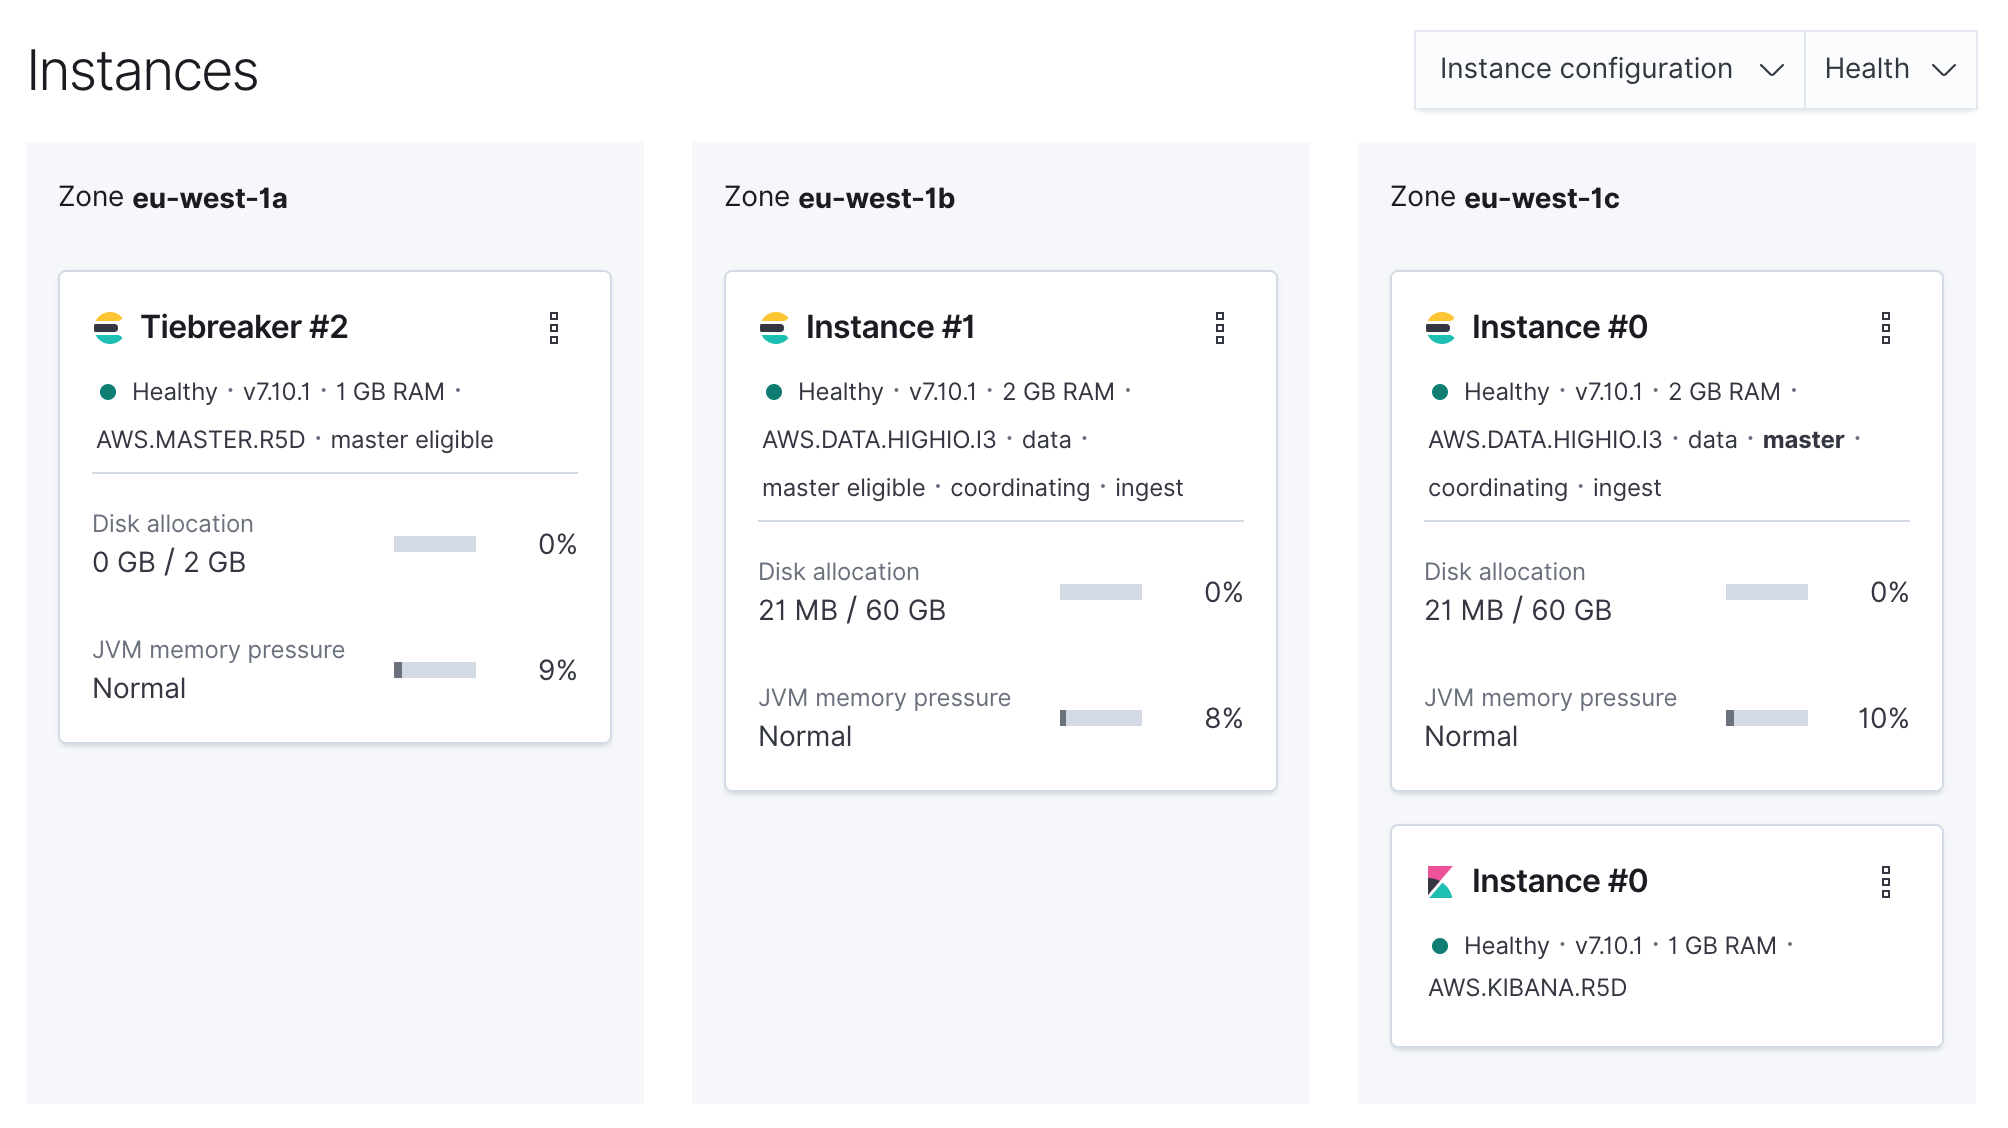
Further down the page, you can see an overview of your cluster. Two things are sticking out here:
- You can apply an upgrade.
- Your single Elasticsearch instance doesn’t provide high availability.
To fix this, you need to apply two changes to your terraform.tf file:
- Change to the latest version with
version = "7.10.1". - Add a second availability zone in
elasticsearchandtopologywithzone_count = "2".
But you must apply them one at a time. Otherwise, you’ll run into the error:
api error: clusters.topology_and_version_change.prohibited: You must perform a version upgrade separately from changes to the cluster topology (memory, number of zones, dedicated master nodes, etc). The following topology changes have been detected: zone_count changed (resources.elasticsearch[0])
So change one of the two settings, apply the change with envchain ec terraform apply and then do the same for the other setting. For reference, the final terraform.tf file.
After completion, your cluster is production-ready. Note that Elastic Cloud added a tiebreaker node automatically since Elasticsearch uses quorum-based decision making.
Access the Default Credentials #
While Kibana is the right tool to dive into your data, you want to use Elasticsearch’s REST API for any application access or automation. Since Elastic Cloud enforces security, what are your credentials?
If you look back at the output of the initial terraform apply, you will see (amongst a lot more):
+ resource "ec_deployment" "terraform-demo" {
    + apm_secret_token       = (sensitive value)
    + deployment_template_id = "aws-io-optimized-v2"
    + elasticsearch_password = (sensitive value)
    + elasticsearch_username = (known after apply)
    + id                     = (known after apply)
    + name                   = "terraform-demo"
    + region                 = "eu-west-1"
    + version                = "7.9.0"
The Elasticsearch username is elastic, but the password is randomly generated and hidden. You can retrieve it with the following command where terraform-demo is the name of your cluster:
$ echo ec_deployment.terraform-demo.elasticsearch_password | terraform console
And you can fetch the Elasticsearch endpoint with:
$ echo ec_deployment.terraform-demo.elasticsearch[0].https_endpoint | terraform console
Use both outputs to create the following request; note the extra space in front of the command so your credentials won’t become part of your history:
$  curl -u elastic:<password> https://<cluster-name>.eu-west-1.aws.found.io:9243/
{
  "name" : "instance-0000000000",
  "cluster_name" : "22fe1...",
  "cluster_uuid" : "uWHPf...",
  "version" : {
    "number" : "7.10.1",
    "build_flavor" : "default",
    "build_type" : "docker",
    "build_hash" : "1c34507e66d7db1211f66f3513706fdf548736aa",
    "build_date" : "2020-12-05T01:00:33.671820Z",
    "build_snapshot" : false,
    "lucene_version" : "8.7.0",
    "minimum_wire_compatibility_version" : "6.8.0",
    "minimum_index_compatibility_version" : "6.0.0-beta1"
  },
  "tagline" : "You Know, for Search"
}
Of course, the default credentials should be the starting point to add more users with just the required set of privileges.
Limit Access to Your Cluster #
Speaking of security, Elastic Cloud supports both PrivateLink (on AWS for now) and IP filtering. For extra security of our cluster, you can add an IP filter with Terraform.
First the terraform.tf file needs a new resource with the IP filter — replace 1.2.3.4 with your public IP address:
resource "ec_deployment_traffic_filter" "allow_my_ip" {
  name   = "Allow my IP"
  region = "eu-west-1"
  type   = "ip"

  rule {
    source = "1.2.3.4"
  }
}
And then reference the resource with traffic_filter = [ec_deployment_traffic_filter.allow_my_ip.id] next to the deployment_template_id. Or download the final terraform.tf file.
After applying the change with envchain ec terraform apply, the previous curl command works just like before. But if you change the IP address to something else and apply that update, the response changes — this is an intended error:
$  curl -u elastic:<password> https://<cluster-name>.eu-west-1.aws.found.io:9243/
{"ok":false,"message":"Forbidden"}
Add a Dash of ecctl #
If you want to use the command-line tool ecctl in addition to Terraform, you can use it as well. First, you need to install it:
$ brew tap elastic/tap
$ brew install elastic/tap/ecctl
$ ecctl version
Version:               v1.1.0
Client API Version:    2.8.0-ms48
Go version:            go1.15.2
Git commit:            a2293c25
Built:                 Thu 03 Dec 23:21:49 2020
OS/Arch:               darwin / amd64
Next, reuse the EC_API_KEY environment variable and list your deployment with ecctl:
$ envchain ec ecctl deployment list
ID         NAME             ELASTICSEARCH   KIBANA     APM   ENTERPRISE_SEARCH   APPSEARCH
9072a...   terraform-demo   9072a...        bed04...   -     -                   -
To get more details about this deployment, use the ID from the previous command. The output will be quite long — showing you everything in the earlier screenshots as JSON and more:
$ envchain ec ecctl deployment show 32a82...
For more features, see the command reference documentation or take a look at the available commands and flags of ecctl. And with that, you should have all the necessary tools to automate your Elastic Cloud clusters.
Conclusion #
One final step before you go. Remove the demo cluster to avoid unnecessary cost with the following command and confirm it with yes:
$ envchain ec terraform destroy
…
Destroy complete! Resources: 2 destroyed.
And just like that, everything is gone again. Use your powers with care!
That’s it for a quick introduction. Happy automation and for more information see the examples and documentation on GitHub.
PS: When talking about Infrastructure as Code, I have avoided the pets vs cattle topic quite intentionally. While you don’t want to raise datastores by hand 🐮, you will have to take more care of them than a stateless service 🐶.